I’m going to show you how to set up a free SSL certificate on shared hosting without root access. All you will need is access to your cPanel and a website called Get HTTPS for Free.
Get HTTPS for Free takes you step by step through the process of generating a free HTTPS certificate from the non-profit certificate authority Let’s Encrypt! However, if you have no clue what you’re doing it can be quite daunting, so I’m writing this guide for you 🙂
Many hosts are already supporting Let’s Encrypt! with a cPanel addon which would make this process much easier, so before starting this guide I’d check this list to verify if you have that option. If you have the addon in cPanel, then skip this guide and just use that instead.
If you’re using a Windows PC, I recommend installing Cygwin which will allow you to copy and paste the commands below exactly as they’re written. It’s free and open source. Just be sure that the OpenSSL packages are included when you install it. OpenSSL should install by default on the newest version. If you’re on Linux or Mac, just use terminal as usual.
Step 1
Go to Get HTTPS for Free in your web browser and you will see the first section labeled Step 1: Account Info.
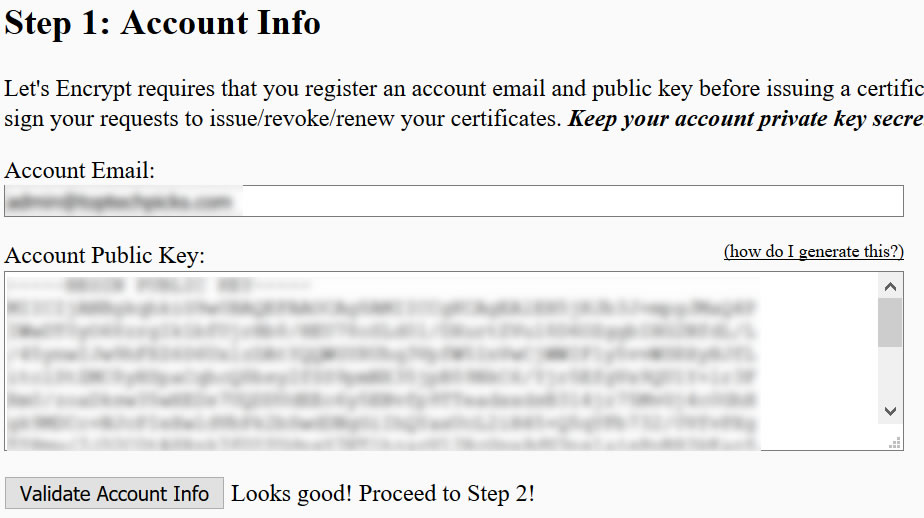
Go ahead and enter an email under Account Email.
Below that it asks for an Account Public Key. For this, open up Cygwin or terminal and paste the following command into it and hit enter. (Paste in Cygwin is Shift+Ins)
openssl genrsa 4096 > account.key
It will say “Generating RSA private key, 4096 bit long modulus” followed by a bunch of dots. When it’s done, copy and paste the next command into Cygwin/terminal and hit enter.
openssl rsa -in account.key -pubout
It will output a block of letters and numbers beginning with
—–BEGIN PUBLIC KEY—– and ending with —–END PUBLIC KEY—–
Copy that public key, including the BEGIN and END PUBLIC KEY lines, and paste it back into the box labeled Account Public Key in your web browser.
Click Validate Account Info. If everything’s good, it will tell you to proceed to Step 2.
Step 2
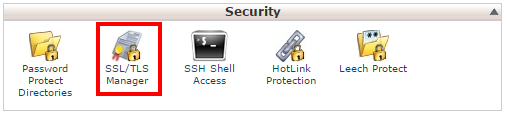
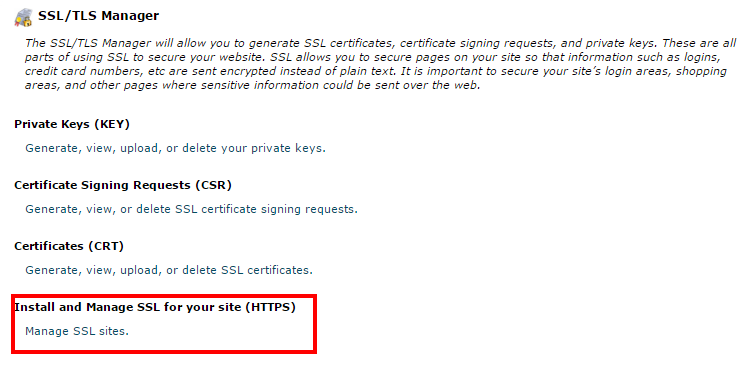
Now browse over to your web host’s cPanel. Find and click the SSL/TLS Manager which should be under the Security section.
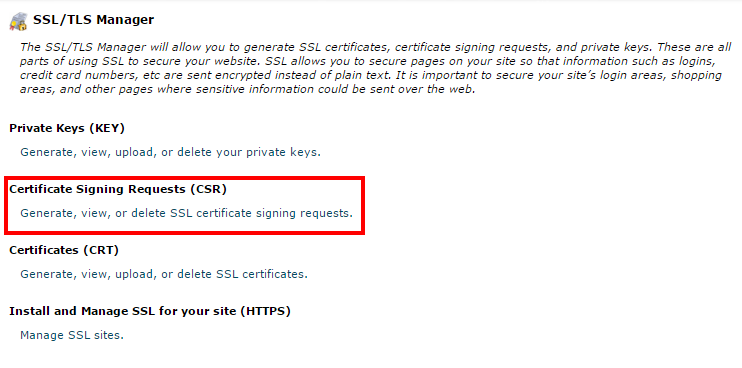
Next click Generate, view, or delete SSL certificate signing requests. under Certificate Signing Requests (CSR)
Scroll down to Generate a New Certificate Signing Request (CSR) under which you will see boxes labeled Key, Domains, City, etc.
In the Domains box type your domain with and without a www. If you need SSL on additional subdomains, go ahead and type those as well, each on it’s own line.
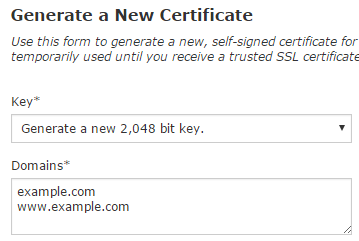
You must also fill out City, State, Country, and Company. When done, hit Generate at the bottom.
This page will reload and you will see a gray box labeled Encoded Certificate Signing Request. Copy the contents of the box, go back to Get HTTPS for Free and paste it into the box labeled “Certificate Signing Request” under Step 2.
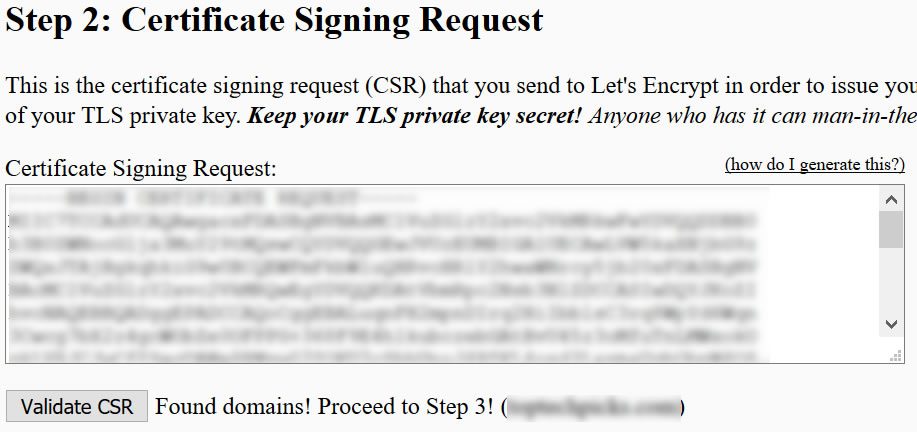
Click Validate CSR and if it finds the domains it will tell to proceed to Step 3.
Step 3
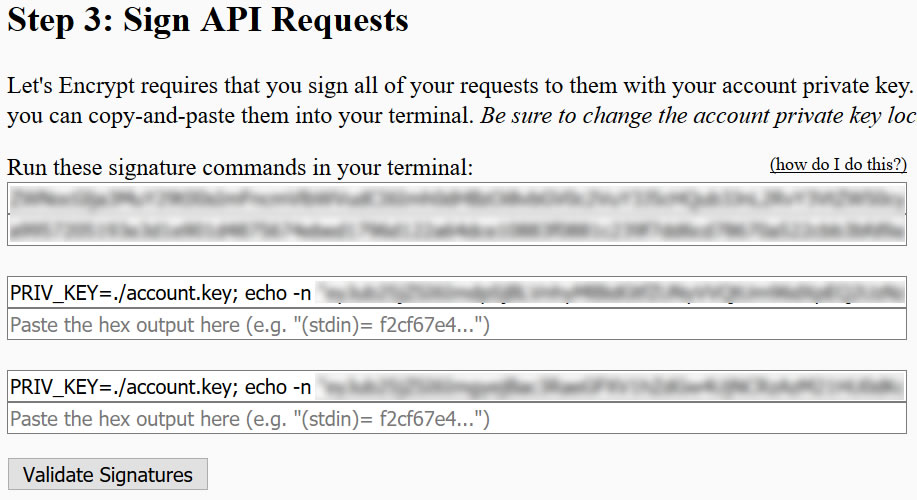
In this step you will see a few pairs of input boxes. For each pair, copy the contents of the top box, paste it into Cygwin/terminal and hit enter. Just beneath your $PRIV_KEY command you will get an output starting with “(stdin)=” followed by a long string of letters and numbers. Copy that string, including the (stdin) part, and paste into into the lower box of the pair in your web browser. Do this for all pairs and hit Validate Signatures. If all is well you can proceed to Step 4.
Step 4
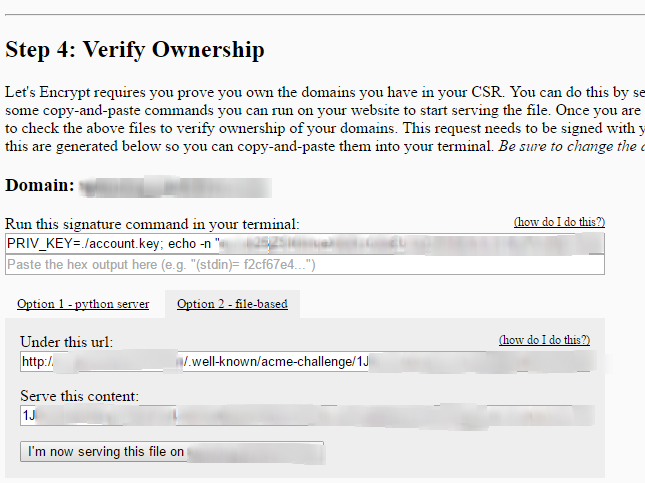
Now you’ll get another pair of boxes where you will do the same thing you did in step 3, but just once this time.
Then beneath that choose the “Option 2 – file-based” tab.
It will ask you to create a file on your website. It’s easiest to use FTP, but you could also use the file explorer on cPanel. For example, the box labeled “Under this url” may say “http://example.com/.well-known/acme-challenge/123456abcdefgh”. So you would go to your site’s root folder and create a folder named “.well-known”, then inside that folder create another folder called “acme-challenge”, then inside that folder create a file called “123456abcdefgh”. Open up that file and paste in the contents of the box labeled “Serve this content” and save it.
Click I’m now serving this file on example.com and if everything is correct it will say “Domain verified!”
Now repeat the same process for each subdomain such as www.example.com, etc.
Step 5
If you made it through Step 4 you should now receive your signed certificate!
Copy the contents of the box labeled Signed Certificate and jump back over to the SSL/TLS Manager in cPanel.
Click on Manage SSL Sites under Install and Manage SSL for your site (HTTPS).
Under the box labeled Domain, select your domain.
Paste your signed certificate into the box labeled Certificate: (CRT) and click the button next to it that says Autofill by Certificate. This should fill out the rest of the boxes for you.
Now just hit Install Certificate and you’re done!
Now you should be able to access your website through HTTPS. Keep in mind that this certificate will expire in 3 months, so you’ll need to go through this process again before it expires to keep it secure.
One more note: This is likely not the end of your ordeal, because the often more difficult job is making sure your site is SSL-ready. This entails going through and fixing any content such as images, old video embeds, scripts, etc, that may still be served over HTTP. These result in mixed content warnings which are a major pain in the ssl… (sorry). I’ll leave that for another time though 🙂
Feel free to comment with any questions or suggestions!
Internet Junkie. Blogging/Social Media/SEO Hobbyist. Nerd.
- How to Install Free HTTPS SSL on Shared Host Without Root Access - October 7, 2016
- How to Format a Hashtag on Reddit - September 19, 2015
- The Feedburner Dilemma: Should I Stay or Should I Go? - September 1, 2014